Image compression is a critical concept within the scope of digital media, where storage and bandwidth constraints often dictate the approach to handling graphics. The primary goal of compression is to reduce the file size of images while preserving their visual quality as much as possible. Understanding the fundamentals of how this works is key for any programmer involved in web development, game design, or multimedia applications.
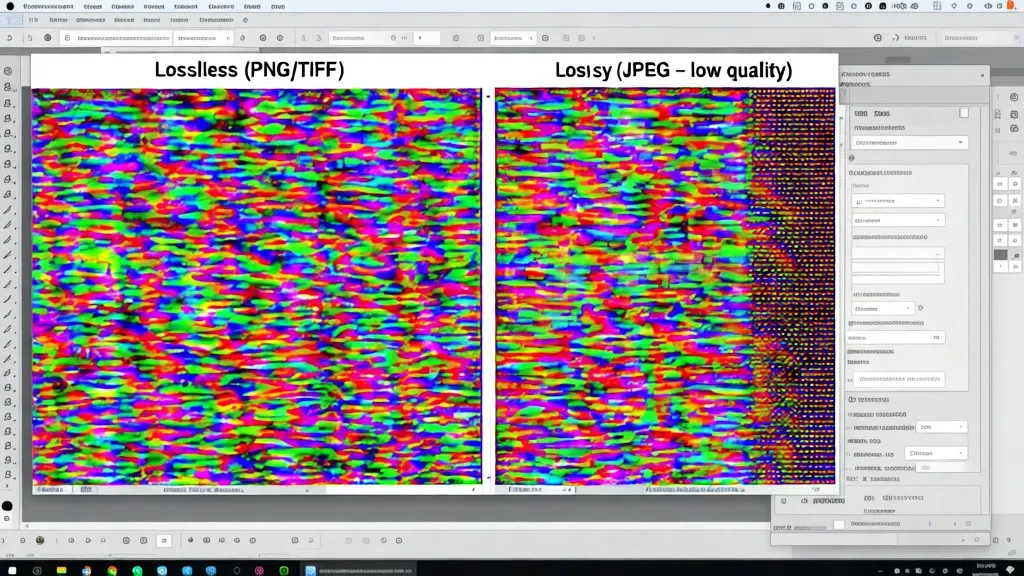
There are two main types of image compression: lossless and lossy. Lossless compression retains all the original data of the image, making it ideal for applications where quality is paramount. On the other hand, lossy compression sacrifices some data to achieve a greater reduction in file size, which is typically acceptable for most web images.
from PIL import Image

def compress_image(input_file, output_file, quality=85):
    image = Image.open(input_file)
    image.save(output_file, "JPEG", quality=quality)

compress_image('input.jpg', 'output.jpg', quality=70)
The above Python code demonstrates how to use the Python Imaging Library (PIL) to compress an image. By adjusting the quality parameter, you can control the balance between file size and image fidelity. The trade-off here is essential; a lower quality setting will yield a smaller file but can introduce noticeable artifacts.
Understanding color spaces is also fundamental to image compression. Most images are stored in the RGB color model, which combines red, green, and blue light in various intensities. However, compression algorithms can use different color spaces, such as YCbCr, which separates the luminance from the chrominance. This separation allows for more efficient compression, especially in lossy formats.
import cv2

def convert_color_space(image_file):
    image = cv2.imread(image_file)
    ycbcr_image = cv2.cvtColor(image, cv2.COLOR_BGR2YCrCb)
    return ycbcr_image

ycbcr_image = convert_color_space('input.jpg')
cv2.imwrite('ycbcr_output.jpg', ycbcr_image)
This example uses OpenCV to convert an image to the YCbCr color space. By performing operations in this color space, you can optimize certain aspects of compression. The luminance channel can often be compressed more aggressively than the chrominance channels without a significant loss in perceived quality.
As you delve deeper into image compression, it’s essential to understand the algorithms employed in various formats. For instance, JPEG compression uses a Discrete Cosine Transform (DCT) to convert spatial data into frequency data, enabling the removal of less significant frequencies. PNG, on the other hand, uses lossless compression techniques such as DEFLATE, which is excellent for images with large areas of uniform color.
import numpy as np
import matplotlib.pyplot as plt

def dct_transform(image):
    return np.fft.fft2(image)

image = plt.imread('input.jpg')
dct_image = dct_transform(image)
plt.imsave('dct_output.jpg', np.abs(dct_image))
Applying these techniques effectively requires an understanding of your target audience and use case. For example, high-resolution images might be necessary for print media, while lower resolutions suffice for web use. Additionally, knowing when to use a lossy format over a lossless one can save bandwidth and improve loading times without sacrificing user experience.
In a real-world application, the choice of compression method and parameters can significantly impact performance. Testing and iterating on different settings for various images will yield the best results. It is also crucial to keep an eye on the latest advancements in compression algorithms, as they continue to evolve and offer better performance and quality trade-offs.

Deco 7 Pro Tri-Band WiFi 7 BE10000 Whole Home Mesh System 6-Stream 10 Gbps | 4 x 2.5G Ports Wired Backhaul, 4 x Smart Internal Antennas, Up to 7,600 Sq.ft, VPN, HomeShield, AI-Roaming (BE63 3-Pack)
$396.50 (as of October 15, 2026 00:39 GMT +00:00 - More infoProduct prices and availability are accurate as of the date/time indicated and are subject to change. Any price and availability information displayed on [relevant Amazon Site(s), as applicable] at the time of purchase will apply to the purchase of this product.)Applying compression techniques effectively
When implementing compression techniques, one must consider the context in which the images will be used. For instance, web applications often prioritize quick loading times, making lossy compression a popular choice. However, for applications involving detailed graphics, such as medical imaging or high-quality photography, lossless compression may be more appropriate.
from PIL import Image

def save_compressed_image(image_path, output_path, use_lossless=False):
    image = Image.open(image_path)
    if use_lossless:
        image.save(output_path, "PNG")
    else:
        image.save(output_path, "JPEG", quality=85)

save_compressed_image('input.jpg', 'output_lossless.png', use_lossless=True)
save_compressed_image('input.jpg', 'output_lossy.jpg', use_lossless=False)
The code snippet above illustrates how to save images in both lossy and lossless formats. By toggling the use_lossless parameter, you can choose between PNG and JPEG, depending on your requirements. Understanding the nuances of these formats can help you make informed decisions about which to use in your projects.
Furthermore, the compression ratio is a critical metric to evaluate. It defines the relationship between the original image size and the compressed image size. A higher compression ratio indicates a smaller file size but may also imply a loss of quality. It’s essential to find a suitable balance that satisfies both storage constraints and visual fidelity.
def calculate_compression_ratio(original_size, compressed_size):
    return original_size / compressed_size

original_size = 2000  # in KB
compressed_size = 500  # in KB
compression_ratio = calculate_compression_ratio(original_size, compressed_size)
print(f"Compression Ratio: {compression_ratio:.2f}:1")
This function calculates the compression ratio, providing insight into the effectiveness of your compression strategy. Monitoring this ratio across different images can guide you in fine-tuning your approach to achieve optimal performance.
Another vital aspect is the choice of compression libraries and tools. Libraries such as Pillow, OpenCV, and imageio offer various functionalities that can be leveraged to automate and enhance the compression process. Using these tools effectively can streamline workflows and improve the quality of the final output.
import imageio

def batch_compress_images(image_list, output_folder):
    for image_file in image_list:
        image = imageio.imread(image_file)
        output_file = f"{output_folder}/{image_file.split('/')[-1].replace('.jpg', '_compressed.jpg')}"
        imageio.imwrite(output_file, image, quality=70)

batch_compress_images(['image1.jpg', 'image2.jpg'], 'compressed_images')
The provided code demonstrates how to batch compress multiple images using imageio. This approach can save significant time when dealing with large collections of images, ensuring consistency in quality and compression settings across your entire library.
Ultimately, the process of applying compression techniques effectively involves a combination of understanding the technical aspects and knowing your audience’s needs. As you refine your methods, consider experimenting with different algorithms, settings, and formats to discover what yields the best balance for your specific applications. The art of image compression is as much about science as it is about
Balancing image quality and file size
the aesthetic appeal of the final product. A well-compressed image should not only meet the technical requirements but also resonate with the visual expectations of users. It is about making informed decisions based on the context in which the images will be displayed, whether on a high-resolution display or a mobile device with limited bandwidth.
One of the more advanced techniques involves the use of perceptual compression, which prioritizes human visual perception in the compression process. This method can lead to significant reductions in file size without a corresponding loss in perceived quality. Techniques like quantization and chroma subsampling are often employed to achieve this balance.
def perceptual_quantization(image, levels=256):
    quantized_image = (image // (256 // levels)) * (256 // levels)
    return quantized_image

image = plt.imread('input.jpg')
quantized_image = perceptual_quantization(image)
plt.imsave('quantized_output.jpg', quantized_image)
The above code implements a simple quantization approach to reduce the number of color levels in an image. By limiting the colors, you can significantly reduce the file size while maintaining a visually acceptable quality. This technique is particularly useful for images with large areas of uniform color.
Additionally, understanding the impact of metadata on file size very important. Images often contain EXIF data, which includes information about the camera settings, date, and location. Stripping unnecessary metadata can further reduce file size, especially in web applications where loading speed is essential.
from PIL import Image

def strip_metadata(image_file, output_file):
    image = Image.open(image_file)
    image.save(output_file, "JPEG", quality=85, exif=None)

strip_metadata('input.jpg', 'output_no_metadata.jpg')
This function demonstrates how to save an image while discarding its EXIF metadata. Such practices can be vital when optimizing images for online use, where every kilobyte counts toward performance.
The balance between image quality and file size is a nuanced challenge that requires a thoughtful approach. By using various techniques and tools, programmers can create optimized images that meet the demands of modern applications. Constant experimentation and adaptation to new technologies will ensure that your image compression strategies remain effective and relevant.