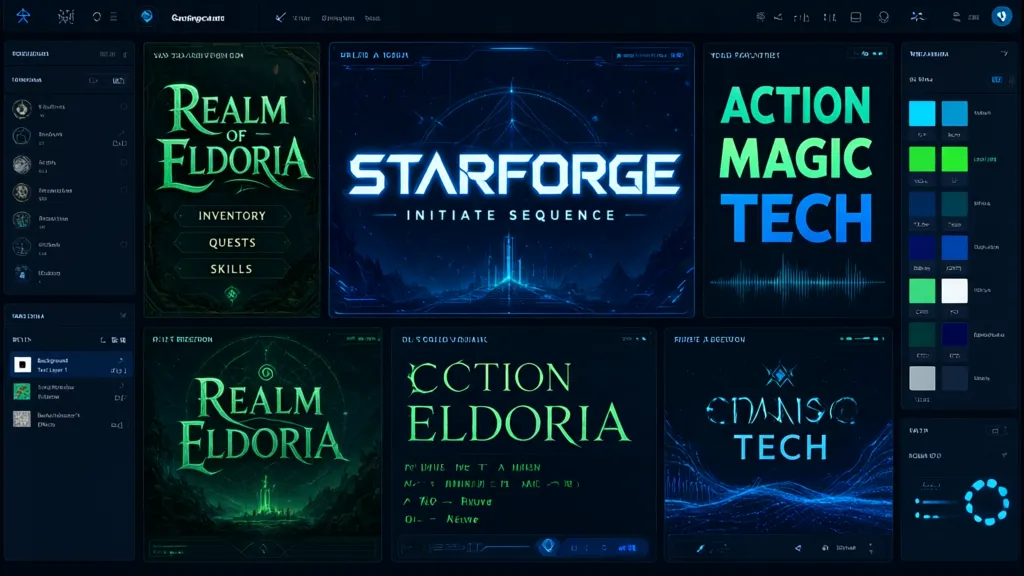
Choosing the right font for your game is more than just a stylistic decision; it can significantly affect the readability and overall feel of your game’s user interface. You want to ensure that players can easily read the text while also complementing the game’s aesthetic. A good starting point is to consider the genre of your game. For example, a horror game may benefit from a more eerie, distorted font, while a casual puzzle game might call for something playful and rounded.
When selecting a font, it’s also essential to consider the size and weight. Larger fonts can be more legible from a distance, which especially important for games that require quick reactions, like platformers or action titles. On the other hand, smaller fonts can allow for more information to be displayed but may make it harder for players to read quickly.
Using a font that has a clear distinction between characters can help avoid confusion. For example, the number “0” should look different from the letter “O,” and the number “1” should be distinguishable from the letter “I.” This distinction can save players from unnecessary frustration during gameplay.
Here’s a simple example of how to load and use a custom font in Pygame:
import pygame

pygame.init()
screen = pygame.display.set_mode((800, 600))

# Load a custom font
font = pygame.font.Font('path/to/your/font.ttf', 36)

# Render text
text_surface = font.render('Hello, Pygame!', True, (255, 255, 255))

# Blit the text onto the screen
screen.blit(text_surface, (50, 50))
pygame.display.flip()
Make sure to test different fonts in various contexts within your game. It’s a good idea to create a mockup of your game’s UI and see how different fonts look when applied to buttons, menus, and in-game text. This will give you a clearer concept of what works and what doesn’t.
Don’t say goodbye to licensing issues if you opt for third-party fonts. Many fonts are free for personal use but require a license for commercial projects. Always check the font’s licensing to avoid any legal complications down the line.
Finally, consider incorporating fallback fonts to ensure that your text remains readable even if the primary font fails to load for some reason. This is particularly useful for cross-platform games where font support may vary.

Now retrieving an image set.
Amazon Physical Gift Card | In a Mini Envelope - Christmas
$50.00 (as of September 21, 2026 16:27 GMT +00:00 - More infoProduct prices and availability are accurate as of the date/time indicated and are subject to change. Any price and availability information displayed on [relevant Amazon Site(s), as applicable] at the time of purchase will apply to the purchase of this product.)Rendering text efficiently in Pygame
Rendering text efficiently in Pygame requires a balance between performance and visual quality. Text rendering can be a bottleneck if not handled correctly, especially in games that require frequent updates to the displayed text, such as scoreboards or chat systems. One effective strategy is to render the text to a surface once and then blit that surface multiple times, rather than rendering the text anew each frame.
Here’s how you can optimize text rendering by caching the rendered text:
import pygame

pygame.init()
screen = pygame.display.set_mode((800, 600))
font = pygame.font.Font('path/to/your/font.ttf', 36)

# Function to create a cached text surface
def create_text_surface(text, color):
    return font.render(text, True, color)

# Cache the text surface
cached_text_surface = create_text_surface('Hello, Pygame!', (255, 255, 255))

# Main loop
running = True
while running:
    for event in pygame.event.get():
        if event.type == pygame.QUIT:
            running = False

    screen.fill((0, 0, 0))
    screen.blit(cached_text_surface, (50, 50))
    pygame.display.flip()

pygame.quit()
This approach minimizes the number of times you have to call the font rendering function, which can be costly. Instead, you create the text surface once and reuse it, leading to smoother performance.
Another technique to enhance text rendering performance is to use the pygame.font.Font.render() method’s anti-aliasing option wisely. While anti-aliasing can make text look smoother, it also requires more processing power. If you notice performance issues, consider disabling anti-aliasing for less critical text.
Here’s an example of rendering text without anti-aliasing:
text_surface = font.render('Hello, Pygame!', False, (255, 255, 255))
In addition to caching and anti-aliasing, you should also be mindful of the frequency at which you update text. If the displayed text doesn’t change often, avoid re-rendering it every frame. Instead, update the display only when necessary, such as when the score changes or a new message is received.
For dynamic text updates, consider using a separate thread or timer to handle text updates. This can prevent the main game loop from being blocked by text rendering tasks, keeping your game running smoothly.
Creating custom fonts and styles
Creating custom fonts and styles in Pygame allows you to personalize your game’s aesthetic and enhance its overall presentation. You can design unique fonts that fit perfectly with your game’s theme, whether it is whimsical, serious, or futuristic. Pygame supports TrueType fonts, which means you can use any font file that conforms to this standard.
To create a custom font, you first need to have a .ttf file. There are many online resources where you can design your fonts or download existing ones. Once you have your font file, loading it into Pygame is simpler. You can specify the font size when loading the font, allowing you to create a hierarchy of text sizes for different UI elements.
Here’s how you can create and use a custom font in Pygame:
import pygame

pygame.init()
screen = pygame.display.set_mode((800, 600))

# Load a custom font
custom_font = pygame.font.Font('path/to/your/custom_font.ttf', 48)

# Render text with the custom font
custom_text_surface = custom_font.render('Custom Font Example', True, (0, 255, 0))

# Blit the text onto the screen
screen.blit(custom_text_surface, (50, 100))
pygame.display.flip()
Styling your text can also include adding effects such as outlines or shadows. While Pygame does not have built-in support for text outlines, you can simulate this effect by rendering the text multiple times with different colors and offsets.
Here’s an example of creating an outlined text effect:
def render_outlined_text(font, text, text_color, outline_color, outline_width):
    # Create an empty surface to draw on
    text_surface = font.render(text, True, text_color)
    outline_surface = font.render(text, True, outline_color)

    # Create an empty surface with the same size as the text
    outline_rect = outline_surface.get_rect()
    outline_surface.fill((0, 0, 0, 0))  # Set transparency

    # Draw the outline by blitting the text in different positions
    for x_offset in range(-outline_width, outline_width + 1):
        for y_offset in range(-outline_width, outline_width + 1):
            outline_surface.blit(outline_surface, (x_offset, y_offset))

    # Blit the outline first, then the text
    return outline_surface, text_surface

# Use the function to create outlined text
outline, text = render_outlined_text(custom_font, 'Outlined Text', (255, 255, 255), (0, 0, 0), 2)
screen.blit(outline, (50, 150))
screen.blit(text, (50, 150))
pygame.display.flip()
Incorporating styles such as bold, italic, or underline can also be achieved by using different font files or by creating your own variations of the text. This flexibility allows you to maintain a consistent visual language throughout your game.
Remember to test how these custom fonts and styles appear on different screens and resolutions. What looks good on your development machine might not translate well to other devices. Always account for varying screen sizes and aspect ratios to ensure that your text remains legible and visually appealing.