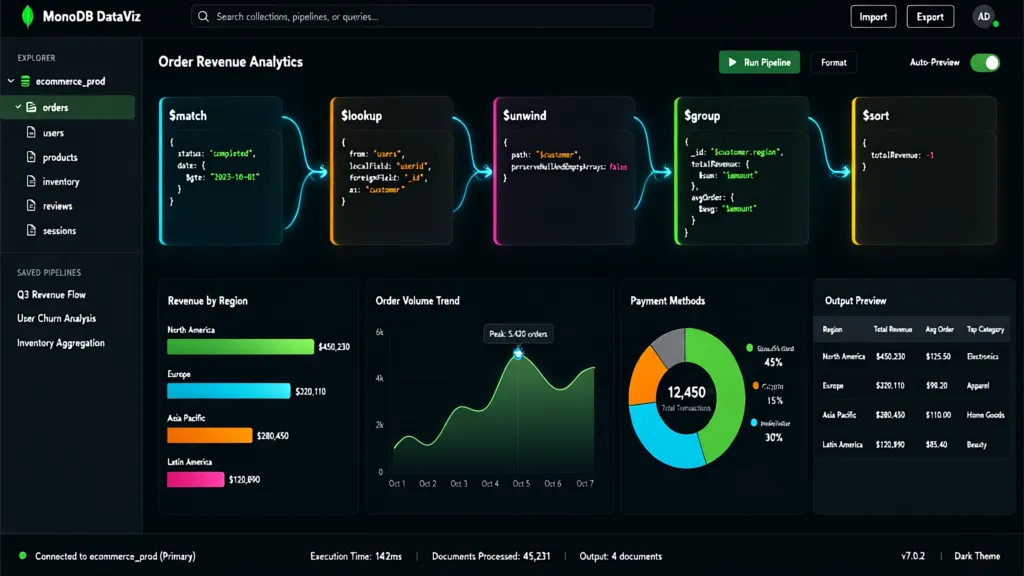
MongoDB’s aggregation framework is a powerful tool for processing and analyzing large volumes of data. It allows you to perform operations such as filtering, grouping, and sorting data in ways that are efficient and scalable. At its core, an aggregation pipeline consists of a series of stages, each transforming the data as it passes through.
The pipeline uses a series of stages, where each stage is an operation that transforms the data. For instance, you can use the $match stage to filter documents, followed by $group to aggregate data. This modular approach allows you to build complex queries while keeping your code organized and readable.
Here’s a simple example of how an aggregation pipeline might look:
db.sales.aggregate([
  { $match: { status: "completed" } },
  { $group: {
      _id: "$productId",
      totalRevenue: { $sum: "$amount" }
  }}
])
This example filters the sales collection to include only completed transactions and then groups the results by productId, calculating the total revenue for each product. The flexibility of the pipeline means you can easily add more stages to refine your analysis.
Understanding how to effectively use these stages is important. Each stage can output its results to the next stage, which allows for a highly customizable flow of data transformation. For instance, you might want to sort the results after grouping to display the top products by revenue.
Here’s how you can incorporate a $sort stage into your pipeline:
db.sales.aggregate([
  { $match: { status: "completed" } },
  { $group: {
      _id: "$productId",
      totalRevenue: { $sum: "$amount" }
  }},
  { $sort: { totalRevenue: -1 } }
])
This addition ensures that the results are ordered by total revenue in descending order. As you get more comfortable with the aggregation framework, you’ll find that you can construct increasingly complex queries that yield insightful analytics, all while maintaining performance.
Using the aggregation framework efficiently often requires a good understanding of the data you’re working with and the operations you need. It is essential to think through your data flow and how each transformation stage will affect the overall performance and readability of your query.
As you dive deeper, consider the implications of each operator and how they fit into your overall data strategy. You may find that certain operations, like $lookup, which performs a join-like operation, can drastically change the performance characteristics of your pipeline, especially as your datasets grow.
It is also worth noting that MongoDB provides several built-in operators and expressions that can simplify common tasks. Familiarizing yourself with these can save you a lot of time and make your queries cleaner. For example, using $project to reshape documents can be particularly useful when you want to include only specific fields in your output.
db.sales.aggregate([
  { $match: { status: "completed" } },
  { $group: {
      _id: "$productId",
      totalRevenue: { $sum: "$amount" }
  }},
  { $project: {
      productId: "$_id",
      totalRevenue: 1,
      _id: 0
  }}
])
This stage effectively removes the default _id field from the output, providing a cleaner result set. It’s these little tweaks that can make a big difference in how you present and analyze your data.
As you practice with different pipelines, keep an eye on the performance metrics provided by MongoDB. The explain plan can give you insights into how your queries are executing and where you might need to optimize. Understanding the cost of each stage can help you make informed decisions about your data processing strategies.
Ultimately, mastering MongoDB aggregation pipelines is about experimentation and learning how to leverage the full power of the framework to meet your data analysis needs. The more you work with it, the more intuitive it becomes, and the better you’ll get at designing efficient, effective queries that yield valuable insights.

blink plus plan with monthly auto-renewal
$11.99 (as of October 24, 2026 20:23 GMT +00:00 - More infoProduct prices and availability are accurate as of the date/time indicated and are subject to change. Any price and availability information displayed on [relevant Amazon Site(s), as applicable] at the time of purchase will apply to the purchase of this product.)Getting started with PyMongo
To get started with PyMongo, the official MongoDB driver for Python, you’ll first need to install the package. This can be easily done using pip, which is the package installer for Python. If you haven’t installed PyMongo yet, you can do so with the following command:
pip install pymongo
Once you have PyMongo installed, you can start connecting to your MongoDB database. The connection is typically established by creating a MongoClient instance, which allows you to interact with your database. Here’s an example of how to connect to a local MongoDB instance:
from pymongo import MongoClient

client = MongoClient('mongodb://localhost:27017/')
db = client['mydatabase']
In this example, we’re connecting to a MongoDB server running on the local machine on the default port 27017. After establishing the connection, we access the database named mydatabase. If the database doesn’t exist, MongoDB will create it for you when you first store data.
Now that you have a connection, you can perform various operations such as inserting documents into a collection. Here’s how you can insert a single document:
collection = db['sales']
result = collection.insert_one({
    'productId': '12345',
    'amount': 100.0,
    'status': 'completed'
})
The insert_one method returns an object that contains information about the operation, including the _id of the newly inserted document. You can also insert multiple documents concurrently using insert_many, which takes a list of dictionaries:
result = collection.insert_many([
    {'productId': '12346', 'amount': 150.0, 'status': 'completed'},
    {'productId': '12347', 'amount': 200.0, 'status': 'pending'}
])
After inserting documents, you might want to query the data. PyMongo provides a simpler way to retrieve documents with the find method. Here’s an example of how to fetch all completed sales:
completed_sales = collection.find({'status': 'completed'})
for sale in completed_sales:
    print(sale)
This retrieves all documents where the status field equals “completed”. You can also apply additional filters to narrow down your results. For instance, if you want to find sales above a certain amount, you can do it like this:
high_value_sales = collection.find({'amount': {'$gt': 100}})
for sale in high_value_sales:
    print(sale)
Working with PyMongo also allows you to update existing documents. The update_one and update_many methods are useful for modifying documents in your collections. For example, to update the status of a specific sale, you can do the following:
collection.update_one(
    {'productId': '12345'},
    {'$set': {'status': 'shipped'}}
)
This command updates the document with productId 12345, changing its status field to “shipped”. If you need to update multiple documents at once, use the update_many method in a similar fashion.
Another important operation is deleting documents, which can be done using delete_one or delete_many. For example, if you want to remove all pending sales, you can execute:
collection.delete_many({'status': 'pending'})
This will remove all documents from the sales collection where the status is “pending”. As you can see, PyMongo provides a comprehensive set of methods for interacting with your MongoDB database, making it a powerful tool for developers.
As you start building your applications, keep in mind that error handling especially important. PyMongo raises exceptions for various errors, such as connection issues or invalid operations. It’s a good practice to wrap your database operations in try-except blocks to gracefully handle these exceptions.
For example:
try:
    result = collection.insert_one({'productId': '12348', 'amount': 250.0, 'status': 'completed'})
except Exception as e:
    print(f"An error occurred: {e}")
By managing exceptions, you can ensure that your application remains robust and easy to use. The journey with PyMongo is about understanding the intricacies of your data and how to manipulate it effectively. With practice, you’ll find that working with MongoDB through PyMongo becomes a seamless experience, so that you can focus on building features rather than wrestling with data access.
Building your first analytics query
When building your first analytics query, it’s essential to know how to structure your aggregation pipeline effectively. Start with a clear objective in mind. For instance, if you want to analyze sales data to understand revenue trends over a specific period, you can leverage the $match stage to filter the data accordingly.
Consider an example where you want to find total sales revenue for completed transactions during the last month. The query might look like this:
db.sales.aggregate([
  { $match: {
      status: "completed",
      date: { $gte: new Date("2023-10-01"), $lt: new Date("2023-11-01") }
  }},
  { $group: {
      _id: null,
      totalRevenue: { $sum: "$amount" }
  }}
])
This query filters completed sales within the defined date range and aggregates the total revenue. Notice how the date filtering is done using the $gte and $lt operators to ensure the range is inclusive of the start date but exclusive of the end date.
As you build more complex queries, you can introduce additional stages to refine your results further. For example, if you want to categorize the total revenue by product, you can modify the previous example by grouping on productId:
db.sales.aggregate([
  { $match: {
      status: "completed",
      date: { $gte: new Date("2023-10-01"), $lt: new Date("2023-11-01") }
  }},
  { $group: {
      _id: "$productId",
      totalRevenue: { $sum: "$amount" }
  }},
  { $sort: { totalRevenue: -1 } }
])
This will give you a breakdown of total revenue by each product for the specified period, sorted in descending order of revenue. It is important to note that the order of operations in your pipeline can significantly affect the results and performance. Grouping before sorting, as shown here, is generally efficient when working with large datasets.
In addition to grouping and sorting, you might want to enrich your data by including additional fields or transforming existing ones. The $project stage is invaluable for this purpose, which will allow you to specify which fields to include or exclude in the output. For instance, if you want to include the product name alongside the total revenue, you can use a $lookup stage to join with another collection containing product details:
db.sales.aggregate([
  { $match: {
      status: "completed",
      date: { $gte: new Date("2023-10-01"), $lt: new Date("2023-11-01") }
  }},
  { $group: {
      _id: "$productId",
      totalRevenue: { $sum: "$amount" }
  }},
  { $lookup: {
      from: "products",
      localField: "_id",
      foreignField: "productId",
      as: "productDetails"
  }},
  { $unwind: "$productDetails" },
  { $project: {
      productId: "$_id",
      productName: "$productDetails.name",
      totalRevenue: 1,
      _id: 0
  }}
])
This query enriches the aggregated data with product names from the products collection. The $unwind stage is used to deconstruct the array created by the $lookup, which will allow you to access the fields within the joined documents. This way, your output will contain not only the total revenue but also the corresponding product names, making your analytics query much more insightful.
As you continue building queries, consider the importance of indexing. Proper indexing can drastically improve the performance of your aggregation queries, especially when working with large datasets. Ensure that the fields you frequently use in your $match stages are indexed appropriately.
Another aspect to keep in mind is the potential need for pagination when dealing with large result sets. You can implement pagination using the $skip and $limit stages to control the number of documents returned and where to start in the result set. That is particularly useful in applications where you display data in chunks, improving the user experience and reducing load times.
By understanding these concepts and practicing building complex queries, you’ll be well on your way to using MongoDB’s aggregation framework to extract meaningful insights from your data. The key is to iterate on your queries, testing and refining them until they meet your analytical needs.
Optimizing performance with pipeline stages
Optimizing the performance of your MongoDB aggregation pipelines involves understanding how each stage interacts with the data and ensuring that you’re using the best practices for efficient execution. One of the primary ways to enhance performance is through the strategic use of indexes. Indexes can dramatically reduce the amount of data that MongoDB needs to scan for your queries, especially in the initial $match stages.
For example, if you frequently filter by the status field in your sales collection, creating an index on that field can significantly speed up queries that begin with a $match on status:
db.sales.createIndex({ status: 1 })
By creating the index, MongoDB can quickly locate the documents with a status of “completed” instead of scanning the entire collection. That is particularly beneficial when dealing with large datasets where performance can become a bottleneck.
After filtering, the next stages of your pipeline should also be optimized. The order of operations matters. For instance, it’s generally more efficient to filter your data as early as possible in the pipeline before performing expensive operations like $group or $lookup. By reducing the dataset size upfront, you minimize the load on subsequent stages.
Let’s consider a scenario where you want to group sales data by productId but only for completed transactions. If you structure your pipeline correctly and use indexes effectively, you can ensure optimal performance:
db.sales.aggregate([
  { $match: { status: "completed" } },
  { $group: {
      _id: "$productId",
      totalRevenue: { $sum: "$amount" }
  }},
  { $sort: { totalRevenue: -1 } }
])
Another important aspect is to limit the amount of data passed through the pipeline. Use the $project stage early in your pipeline to exclude unnecessary fields. This not only reduces the amount of data processed but also improves the readability of your results.
Here’s how you can implement this:
db.sales.aggregate([
  { $match: { status: "completed" } },
  { $project: {
      productId: 1,
      amount: 1
  }},
  { $group: {
      _id: "$productId",
      totalRevenue: { $sum: "$amount" }
  }},
  { $sort: { totalRevenue: -1 } }
])
In this example, we project only the fields we need before grouping, optimizing the data flow through the pipeline. Additionally, consider the impact of using $lookup. While powerful, it can introduce significant overhead if not used judiciously. Ensure that the fields you’re joining on are indexed in both collections to enhance performance.
For instance:
db.products.createIndex({ productId: 1 })
When using $lookup, be mindful of the potential for large result sets. If a join results in a substantial increase in data volume, it may slow down your query. You can mitigate this by filtering the joined data as early as possible, either through the initial $match or by including additional criteria in the $lookup stage.
Here’s an optimized example using $lookup:
db.sales.aggregate([
  { $match: {
      status: "completed"
  }},
  { $lookup: {
      from: "products",
      localField: "productId",
      foreignField: "productId",
      as: "productDetails"
  }},
  { $unwind: "$productDetails" },
  { $match: { "productDetails.category": "electronics" }},
  { $group: {
      _id: "$productId",
      totalRevenue: { $sum: "$amount" }
  }},
  { $sort: { totalRevenue: -1 } }
])
In this case, we filter the product details by category after the join, ensuring we only work with relevant data. This kind of fine-tuning can lead to significant performance improvements.
Finally, always monitor your query performance using the explain plan. This tool provides insights into how MongoDB executes your pipeline, which will allow you to identify bottlenecks and optimize accordingly. Understanding the execution path and the cost associated with each stage can guide you in making the necessary adjustments to enhance performance.
By applying these strategies, you’ll be able to construct efficient aggregation pipelines that not only yield valuable insights but also perform well even under heavy loads. The goal is to strike a balance between complexity and performance, ensuring that your analytics queries remain responsive and effective.